Motivated by rising energy prices I wanted to switch from a standard thermostat to a smart (but cheap) solution using Home Assistant, zigbee temperature sensors and wifi relay for controlling the gas boiler. In the following text I describe the system components and the setup process.
Hardware
- CC2531 Dongle with Antenna
- 5x Tuya ZigBee temperature & humidity sensor
- Custom ESP8266-based Wifi Relay
Setup steps
- Prepare the Zigbee dongle
- Install Home Assistant (HASS)
- Add Zigbee devices to HASS
- Set up reverse proxy for remote access
- Create the Wifi Relay
1) Flashing CC2531 with custom firmware using Raspberry PI
https://www.zigbee2mqtt.io/guide/adapters/flashing/alternative_flashing_methods.html
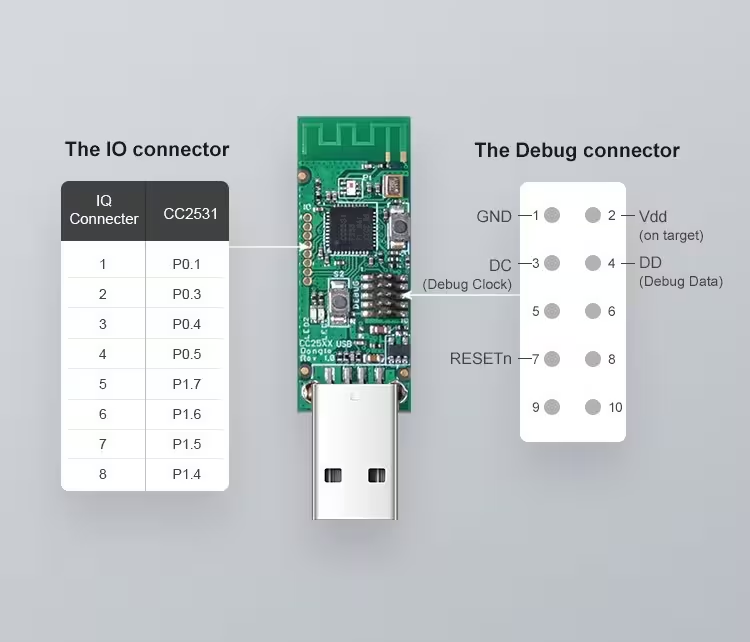
Additionally, I checked the connections after step 3 using the CC2531 pinout chart:

2) Setting up the hub
Sources:
- https://www.home-assistant.io/installation/
- https://wiki.archlinux.org/title/Home_Assistant
I already have a Raspberry PI 4 B up and running. Installing Home Assistant was therefore a matter of running a few commands. The only complication for me was that running the home-assistant service was not possible without first installing Rust.
yaourt -Sy home-assistant rust
systemctl enable --now home-assistant.service
sudo vim /boot/config.txt # disable wifi and bluetooth to mitigate wifi/zigbee interference
sudo gpasswd -a hass uucp # hass user must have access to /dev/ttyACM0
2a) Adding Zigbee devices to HASS
This is possible through the ZHA integration, which is available out-of-the-box in HASS. This way I was able to add my smart lights and crucially the thermometers.
2b) Nginx reverse proxy for Home Assistant
To allow remote access to my home assistant, I wanted to use reverse proxy. This way allows me to access HASS through https easily (using Lets encrypt certificate)
3) Creating the Smart Relay
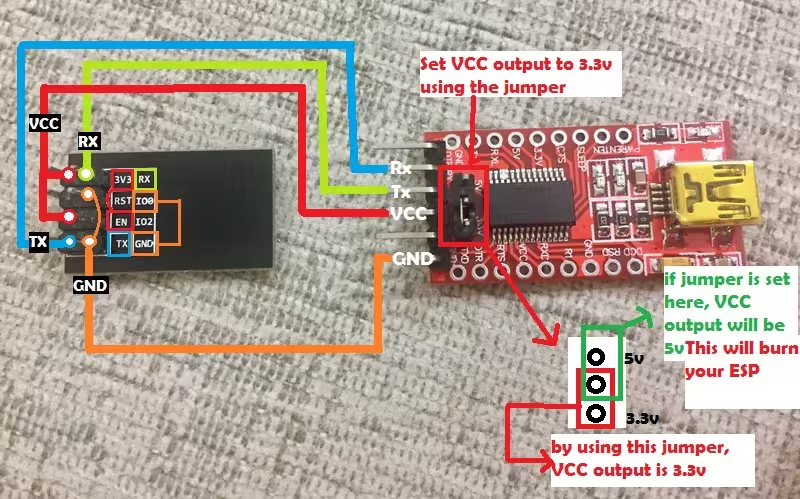
- connect USB-to-TTL to ESP01 using this chart: (note that RX->TX and TX->RX, one can easily mix it up with this chart)

- I had a malfunctioning ESP01 and it didn’t see my home wifi. I tried flashing the latest Espressif firmware
- I ordered another one and it works perfectly.
Flashing ESPHome to ESP01-S: - Install ESPHome manually: https://esphome.io/guides/installing_esphome.html
$ pip install esphome- Create
boiler.yaml. In the wizard select theesp01_1mboard
$ esphome wizard boiler.yaml- Add Switch section with pin
GPIO0toboiler.yaml:
switch:
  - platform: gpio
    name: "Relay"
pin: GPIO0- Compile and flash ESPHome:
$ esphome run boiler.yaml- Connect ESP to the Relay board
- Connect the boiler dry contacts into the relay (use COM and NC outputs)
- Connect +5V power supply into the relay
- Find the IP address of the relay and set up static IP through router settings (using the mac address)
- Restart ESP and add it through ESPHome integration in Home Assistant (entering the static ip)
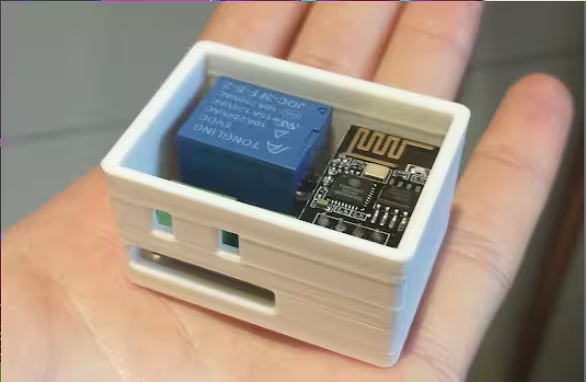
- Ask your friend to print an enclosure box https://www.thingiverse.com/thing:4196595


Leave a Reply