Have you noticed that paper price labels are being replaced in large supermarkets in favor of electronic labels? They are an interesting piece of technology, featuring a nice paper-like screen, which some people even mistake for paper.
In this post we will explore the Solum Newton M3 2.6″ BWR Electronic Shelf Label. I show the device from outside and inside and describe how to connect to it using SWD interface and download the original firmware.
Teardown and specifications
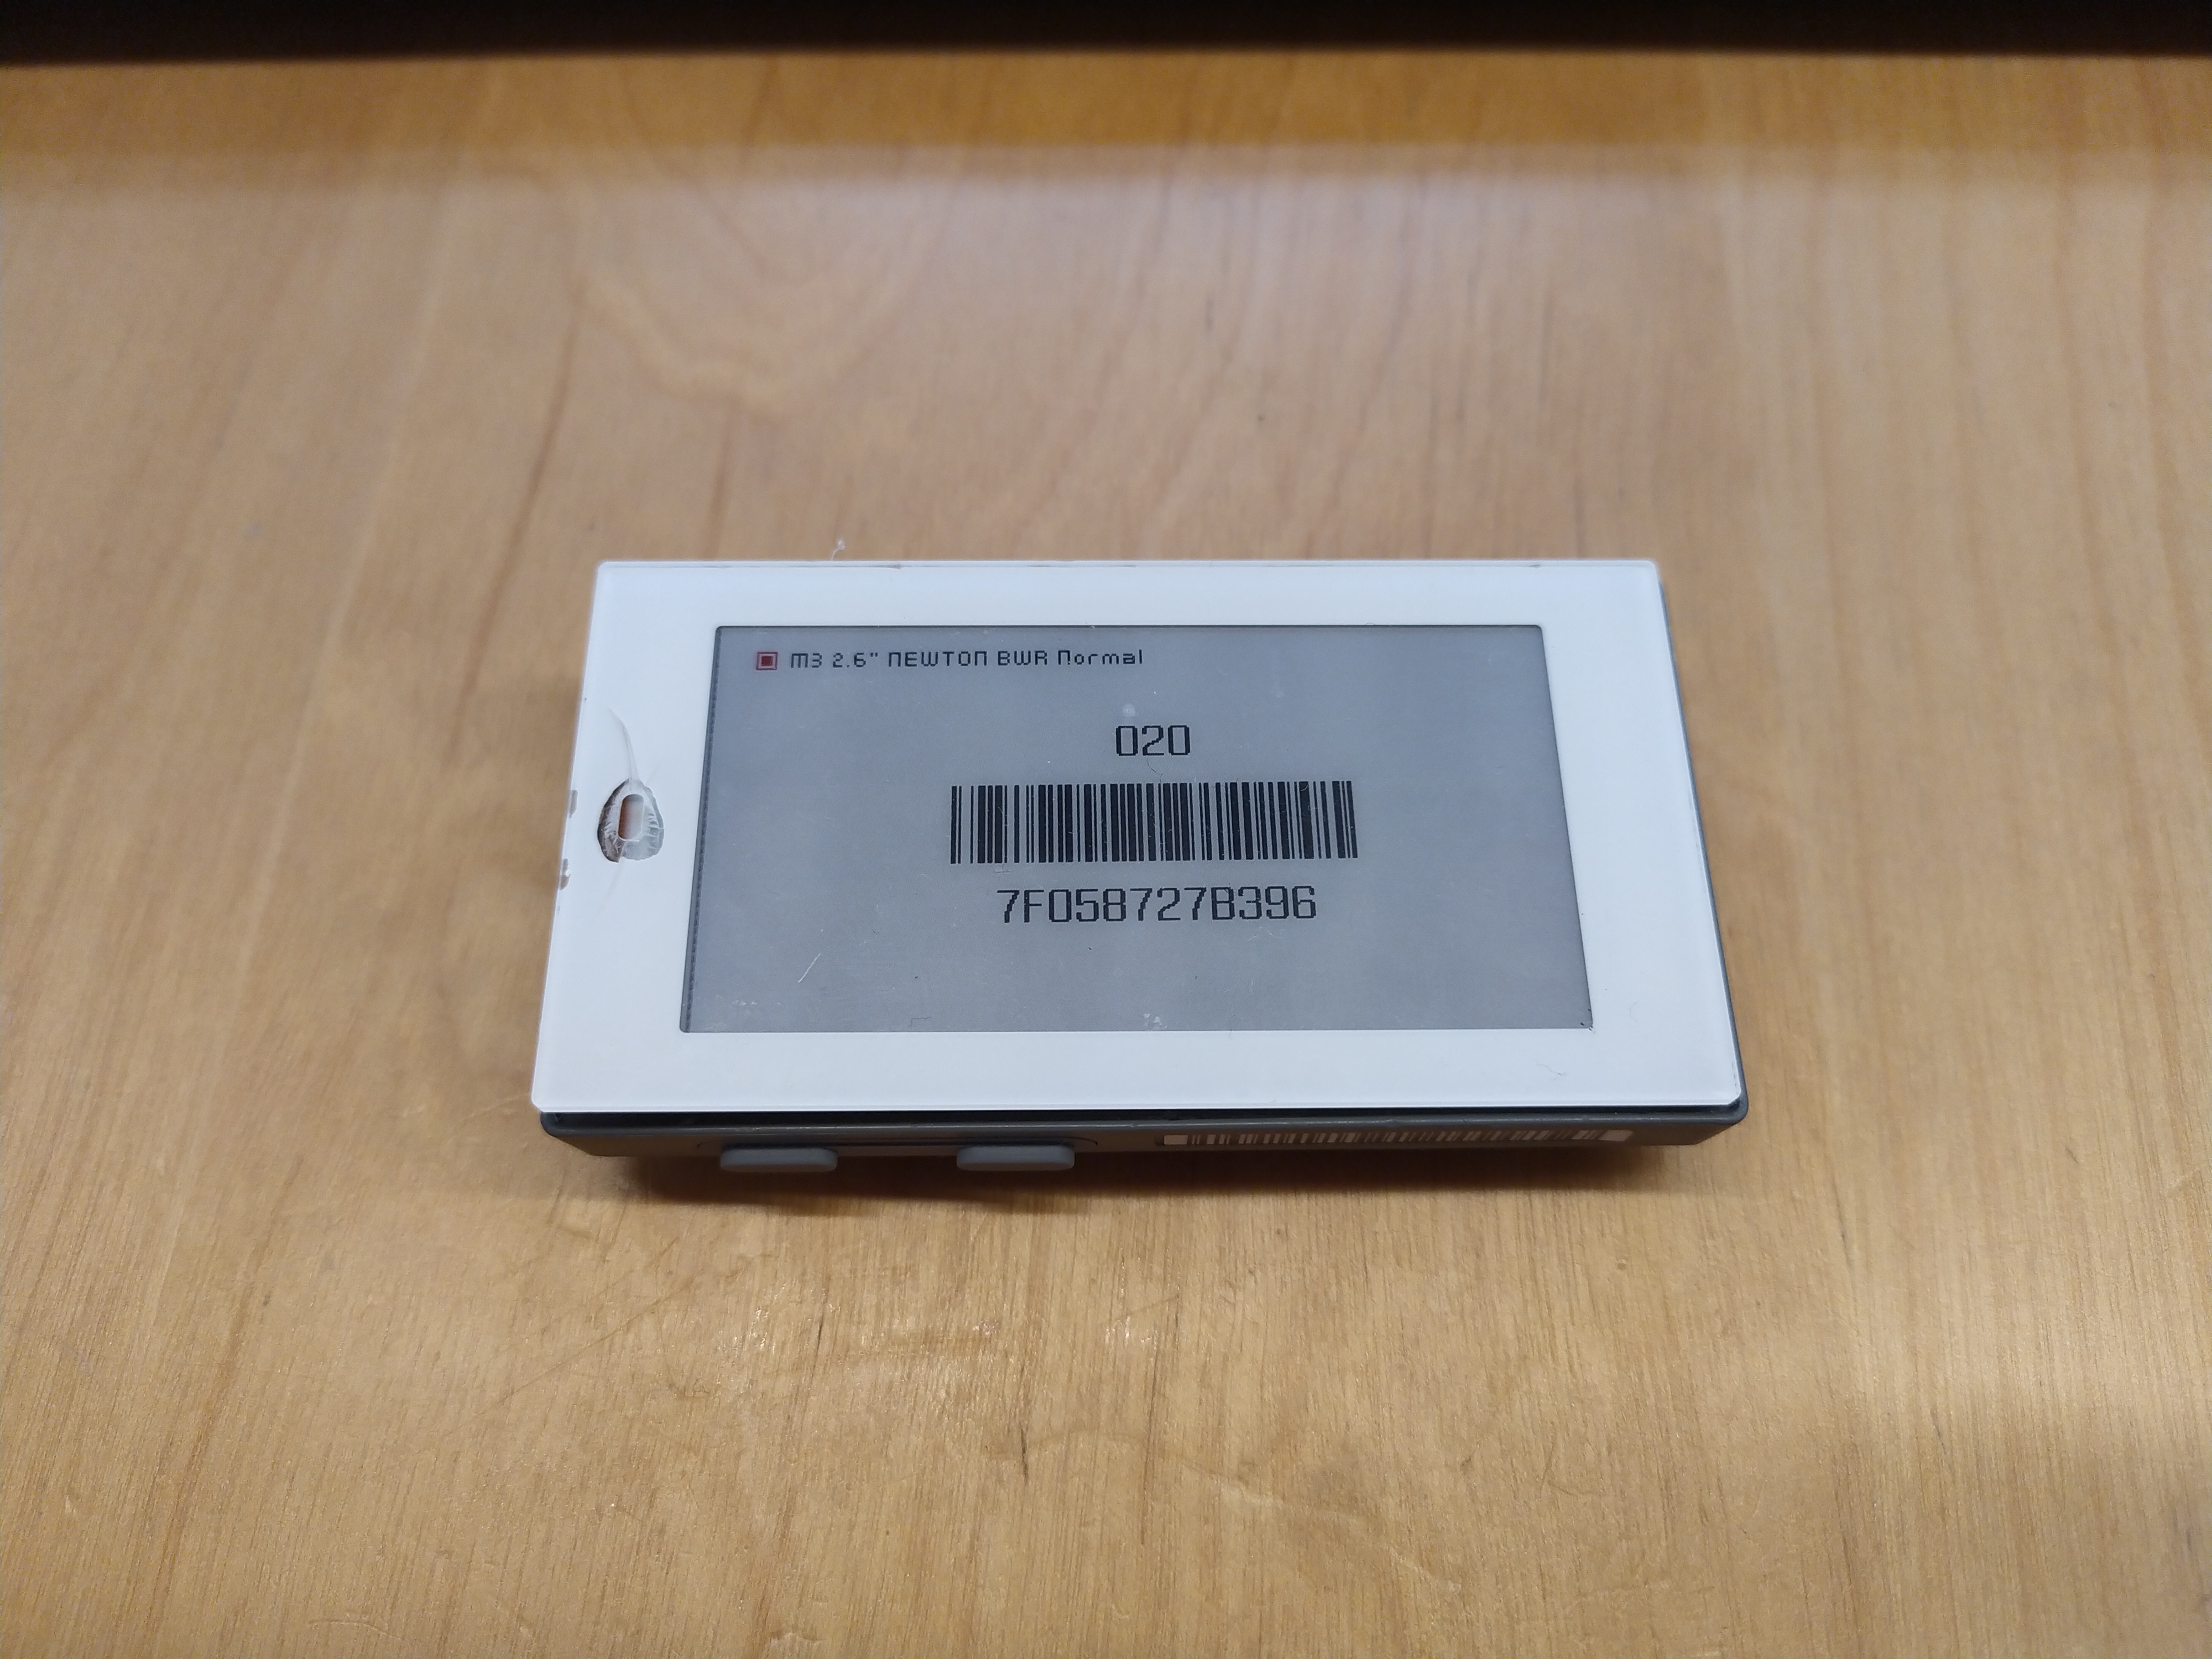
Looking from the outside, the e-ink label looks standard with 2.6 inch black-white-red e-ink screen. On top of that, it has additional nice features that separate it from other similar products:
1) It has a RGB LED status light,
2) It has two buttons on the bottom,
3) the build quality is very nice, the battery cover has rubber isolation to prevent moisture from getting in.
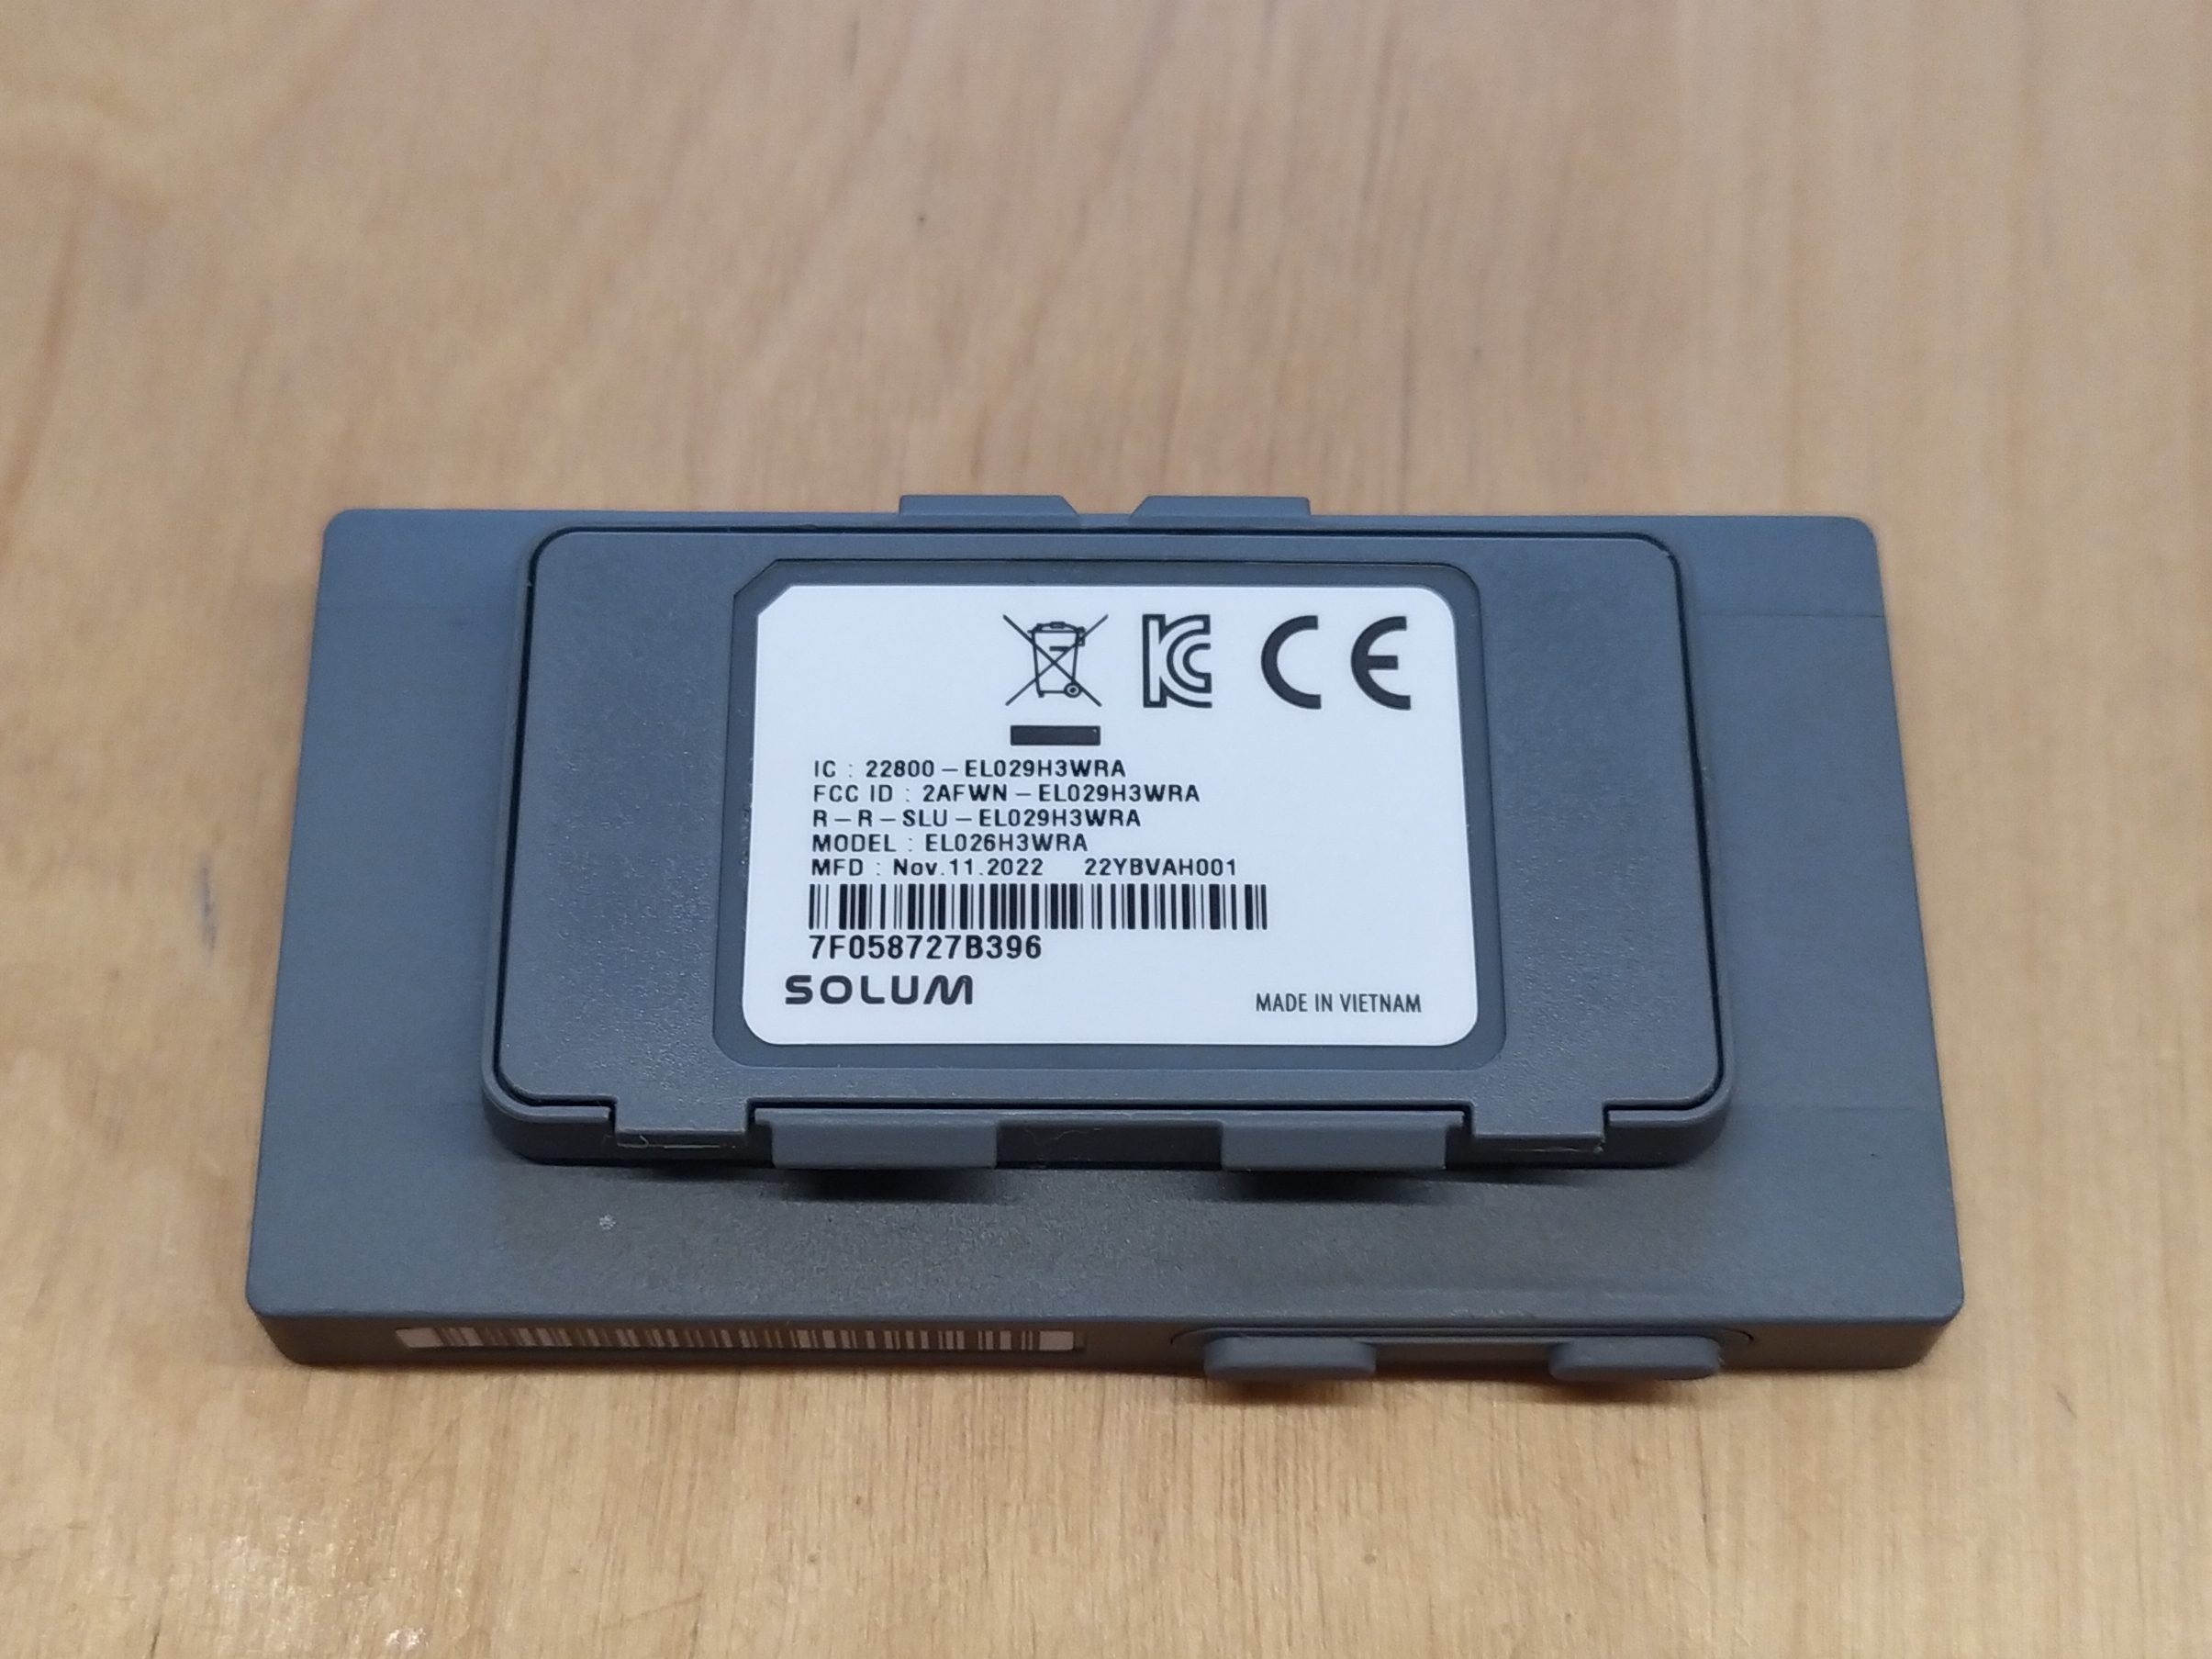
On the back we see the model number EL029H3WRA. The FCC ID is 2AFWN-EL029H3WRA. The FCC also provides the users manual.
To open the device, I first unplugged the battery pack from the back. This reveals two CR2450 cells. Then I removed the front white cover using a thin plastic tool. The hard part is to remove the blue PCB from the plastic cover, one needs to be very careful not to break the eink panel.
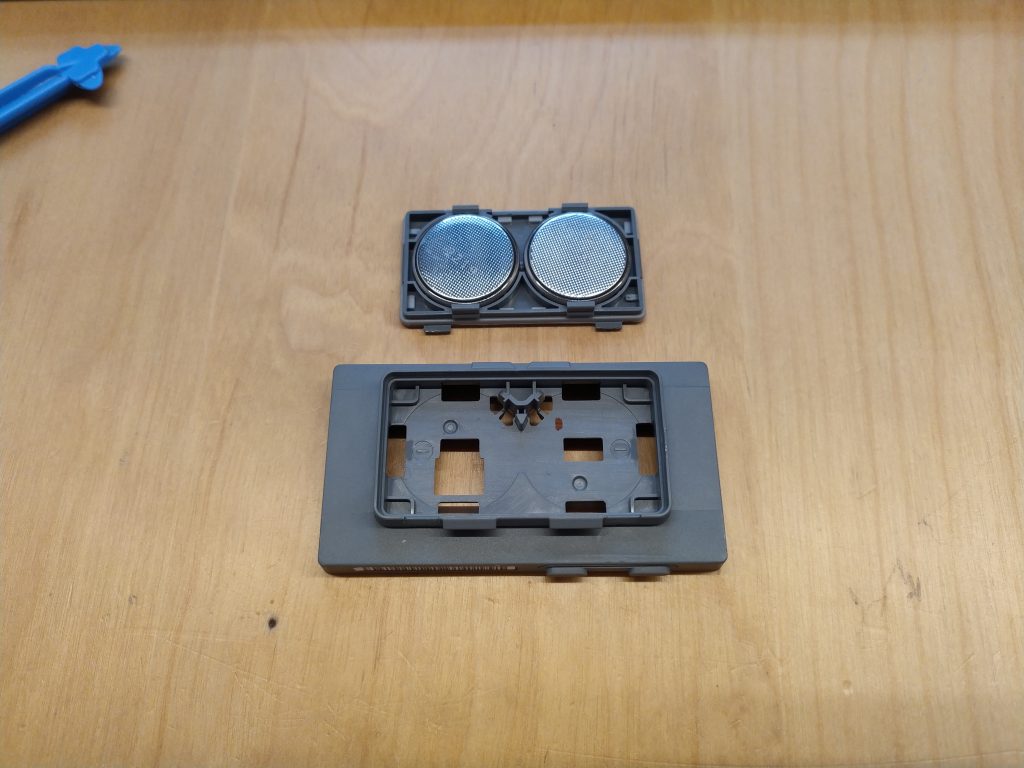
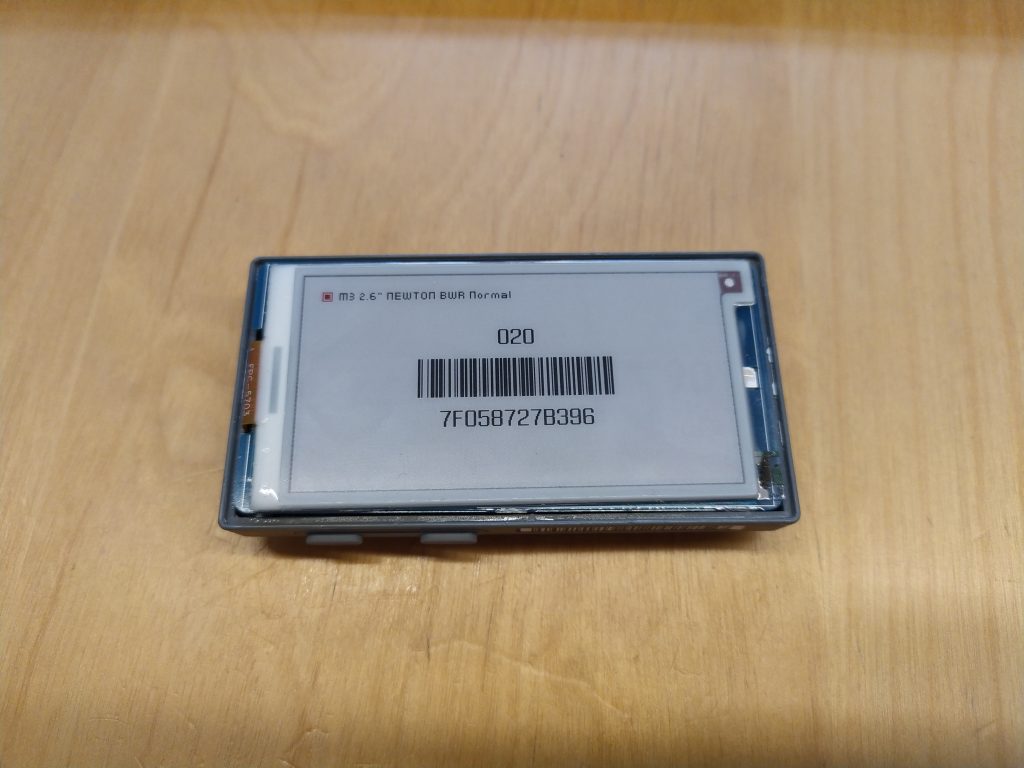
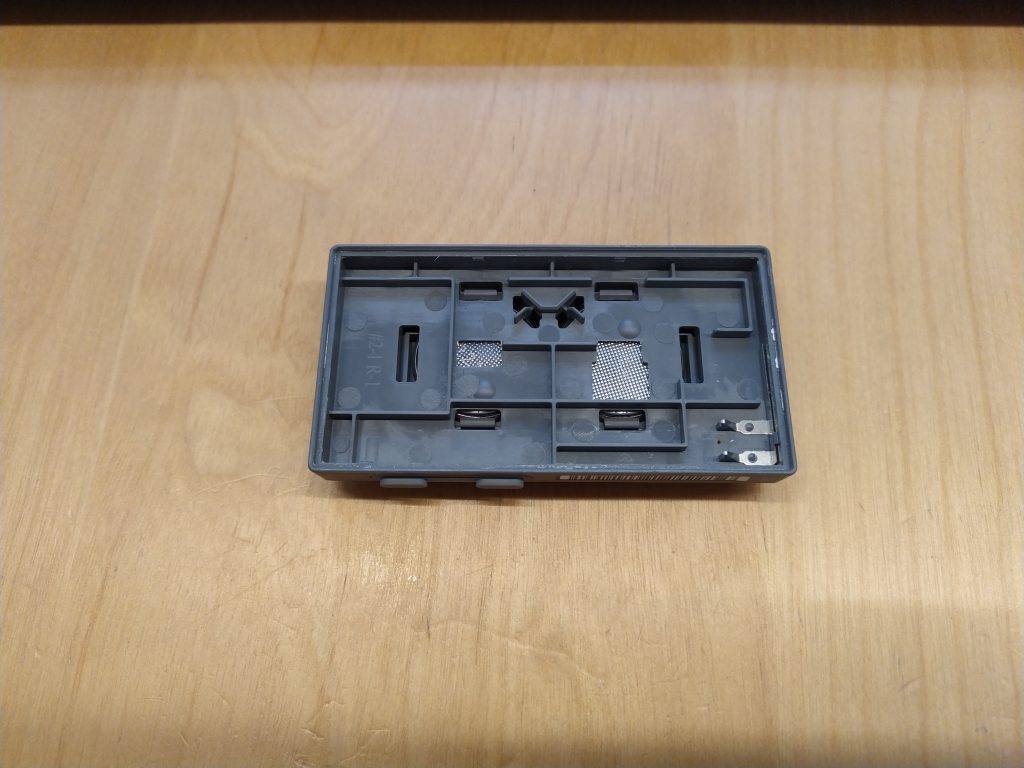
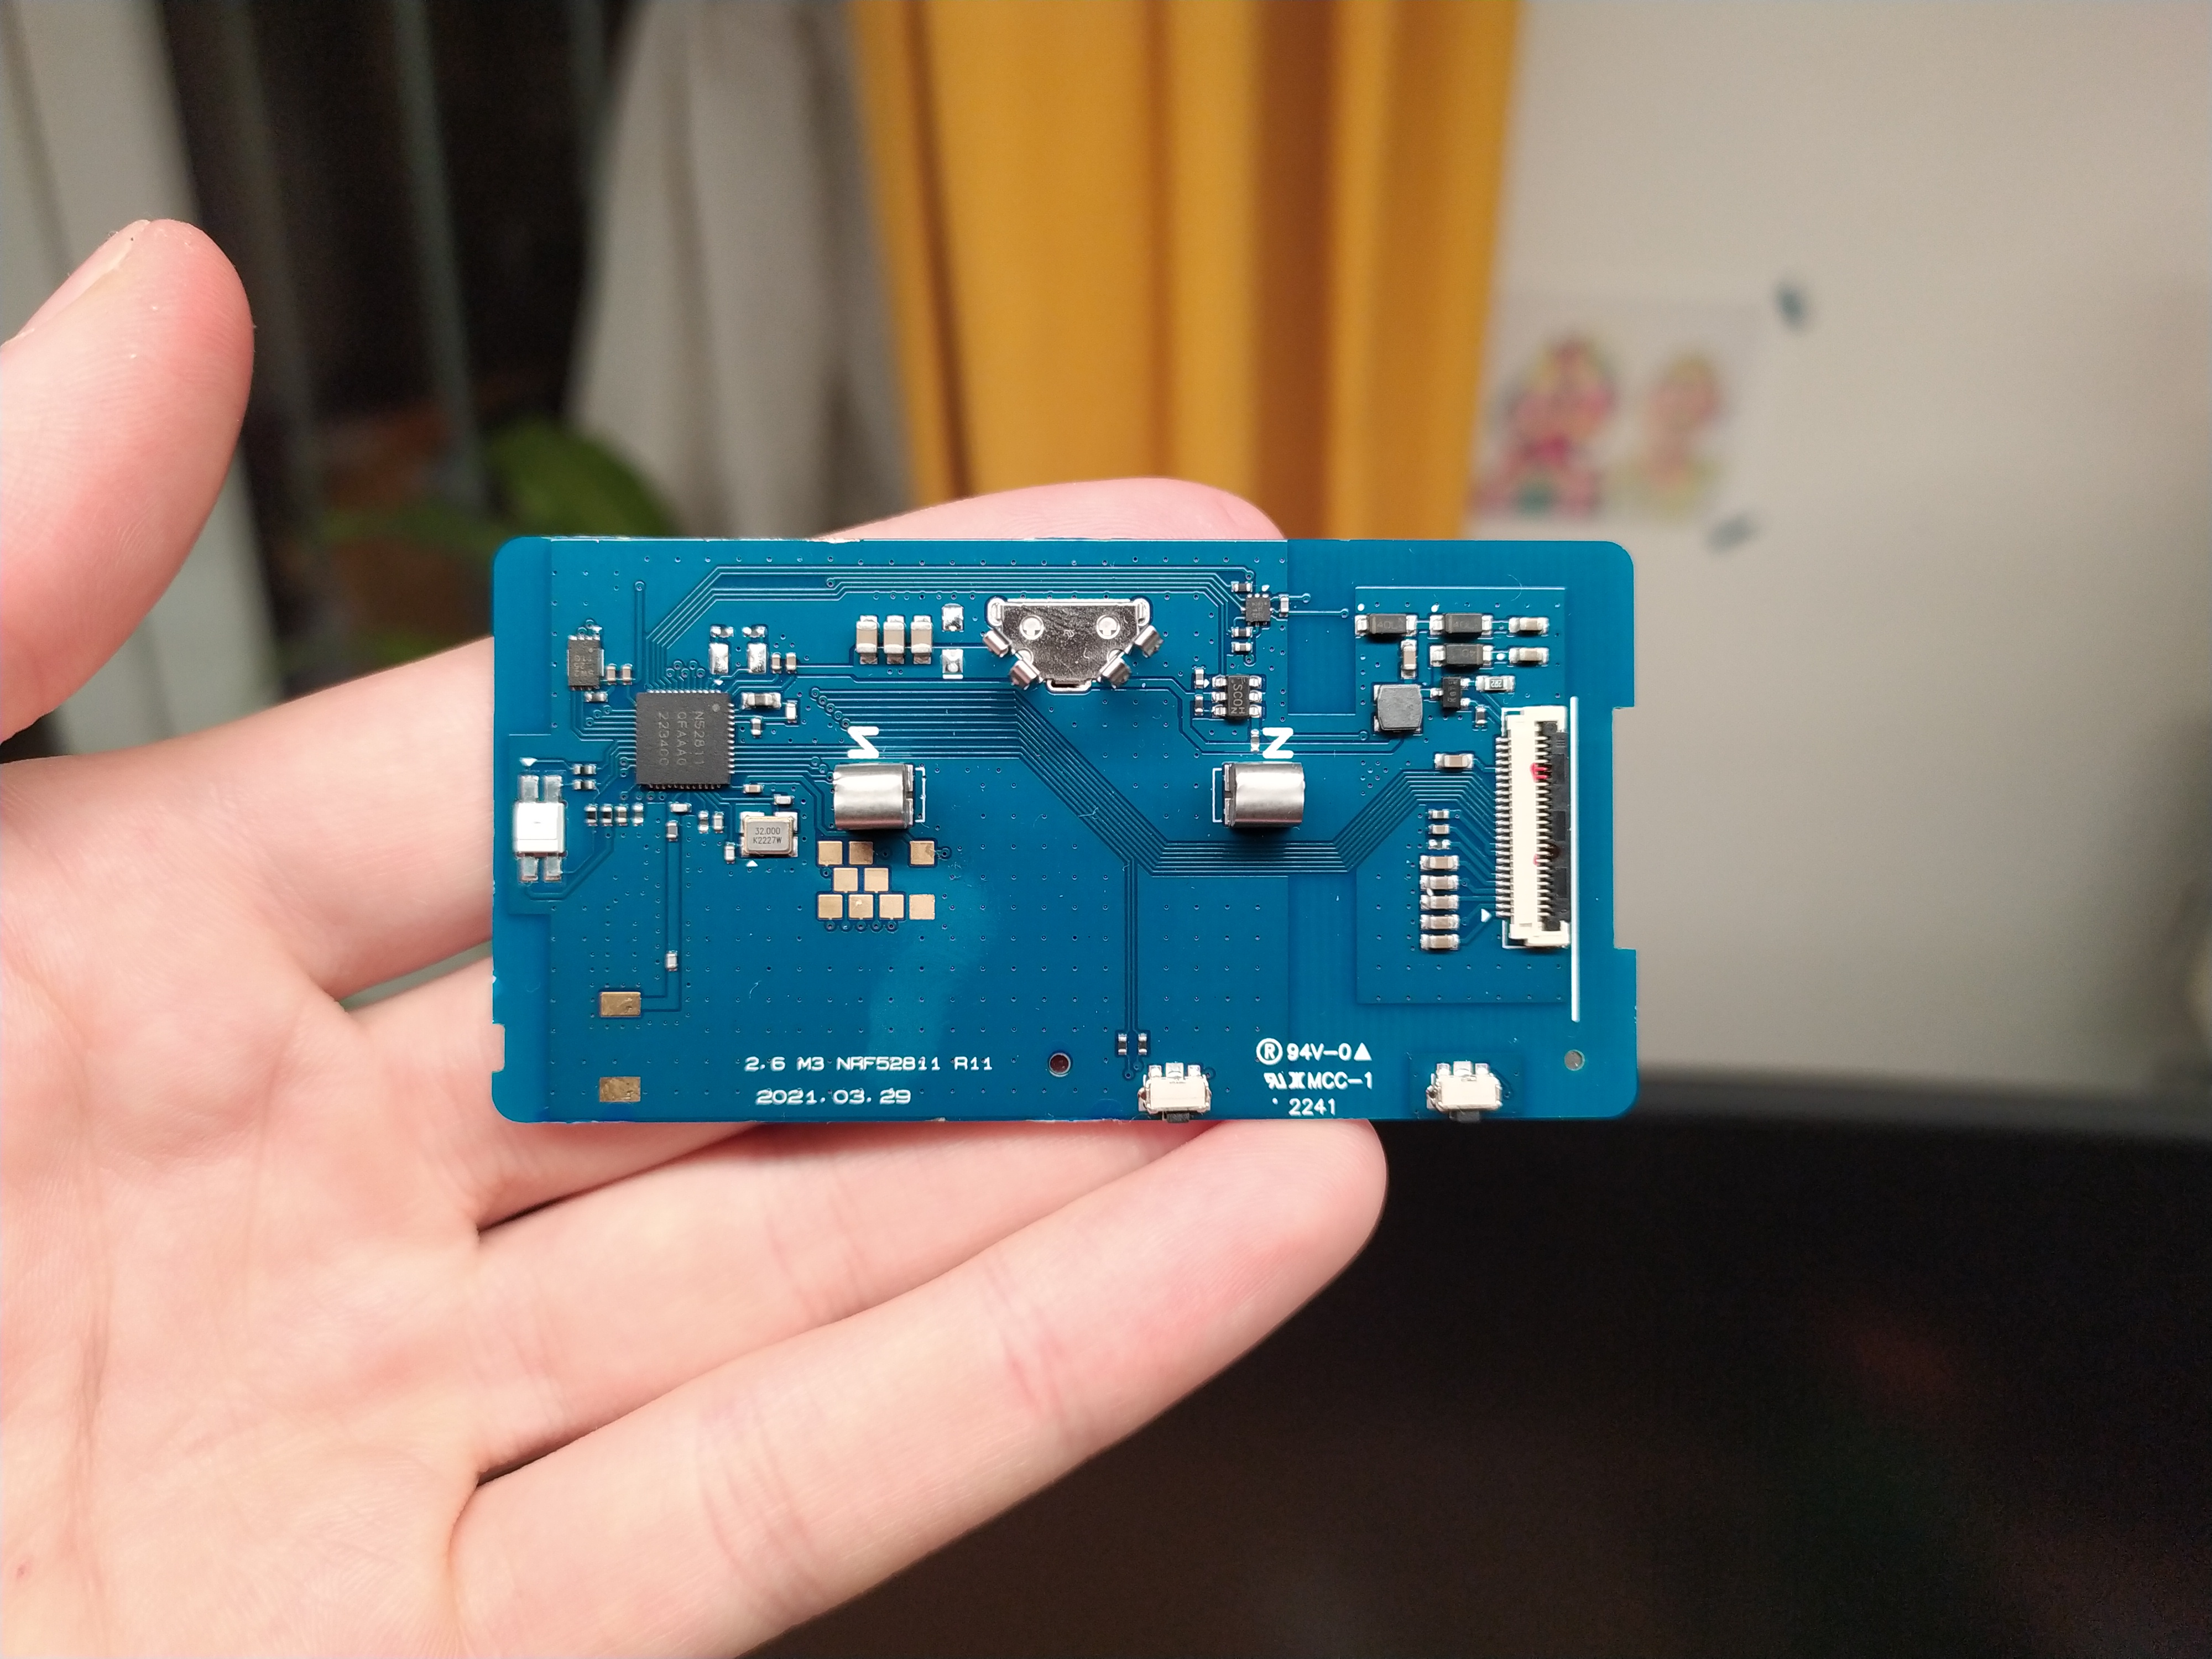
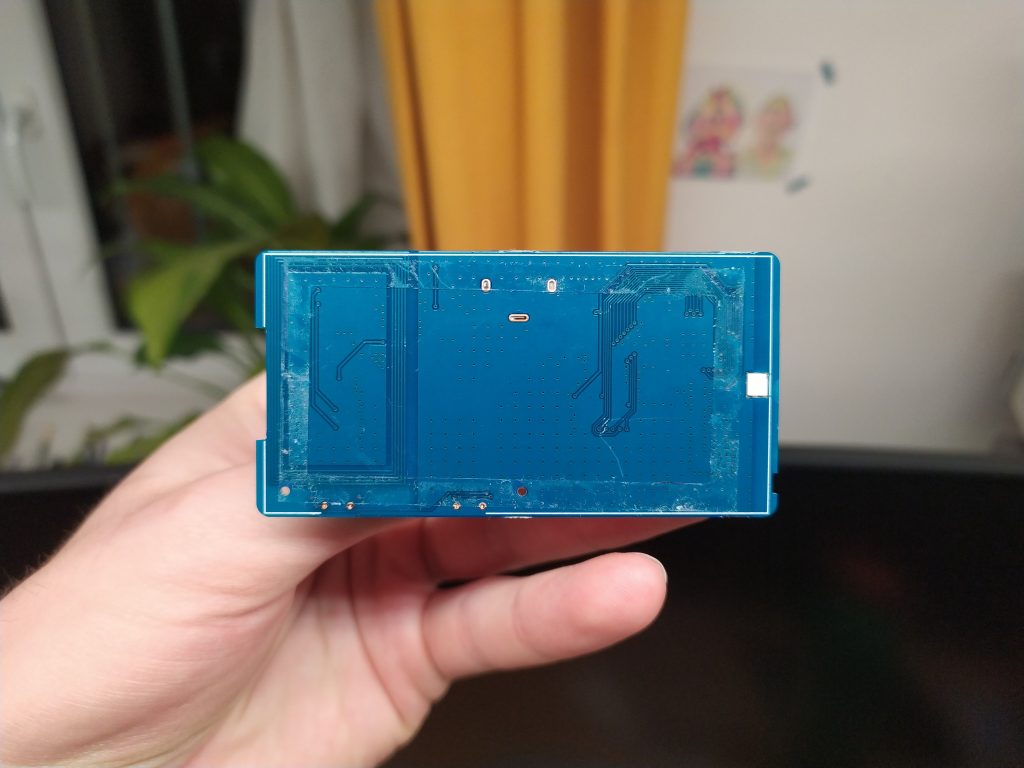
The plastic case contains an external antenna. This separates the Solum from e.g. the SES-imagotag electronic shelf label which uses PCB antenna instead.
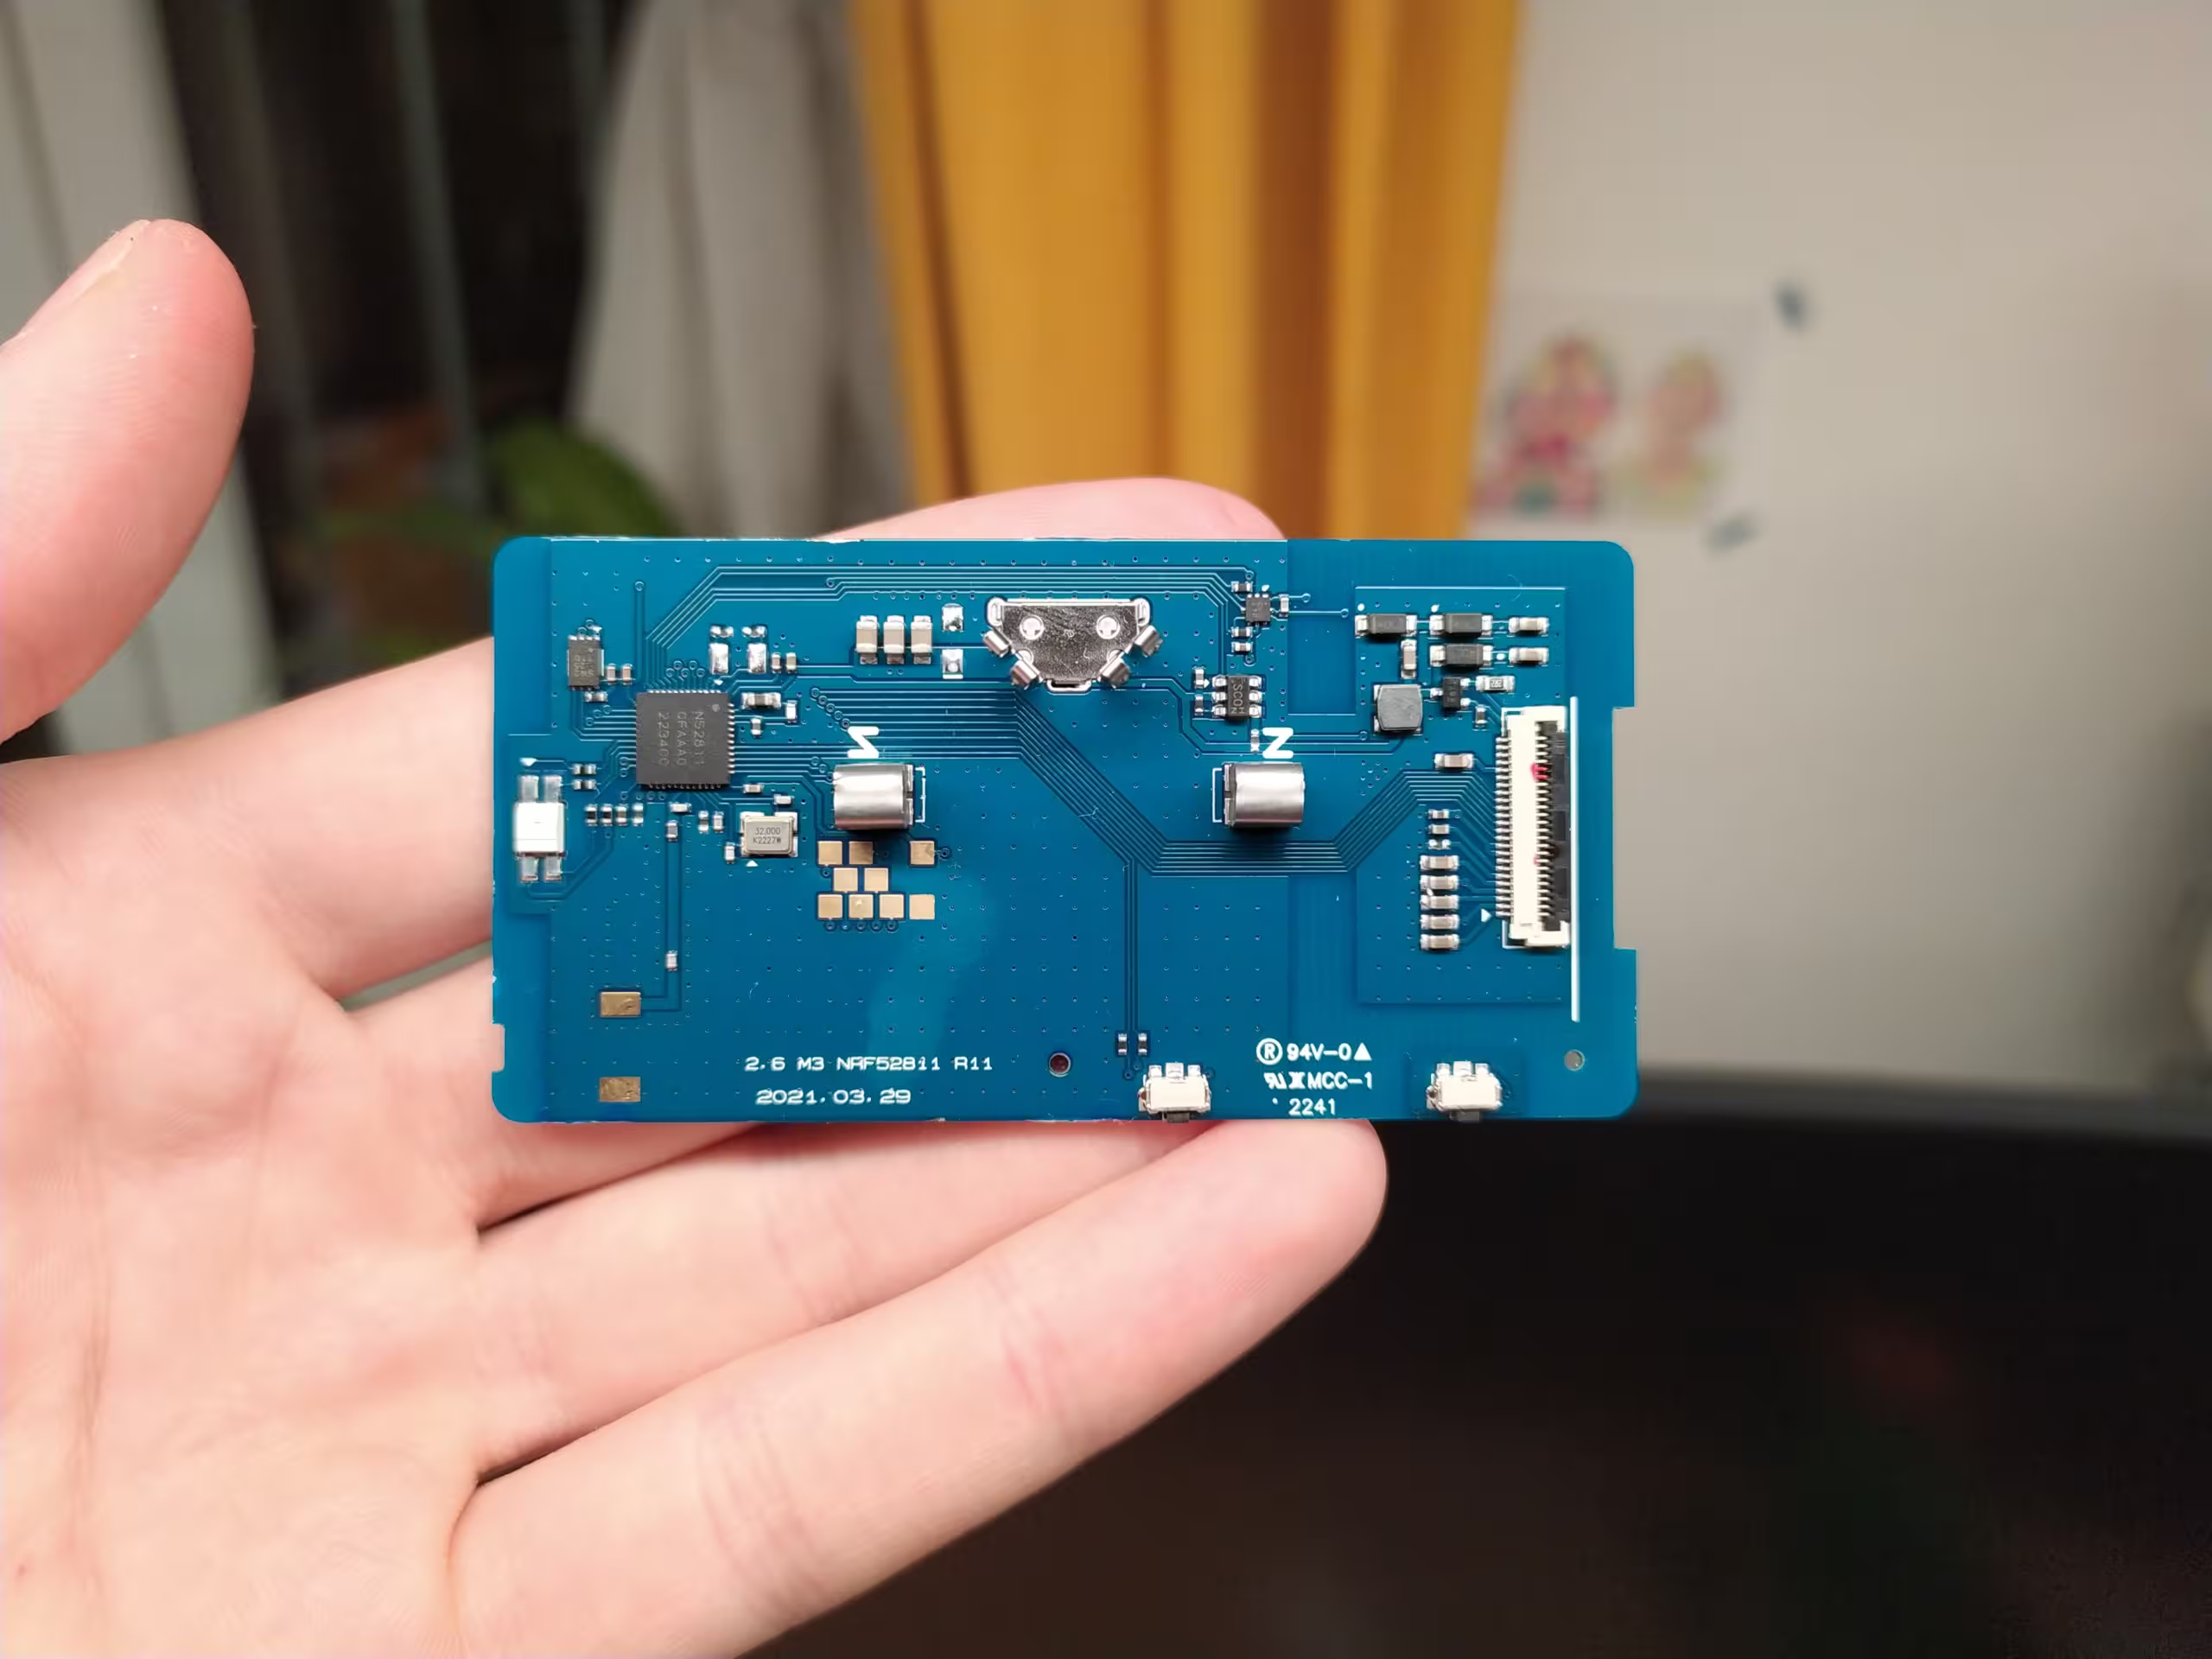
On the PCB we see the main System-on-Chip nRF52811 with 64 MHz Arm Cortex-M4 CPU, 192 KB Flash, 24 KB RAM and Bluetooth capabilities. Additionally, we see a SPI flash memory, NFC antenna, NFC controller and eink driving circuit.
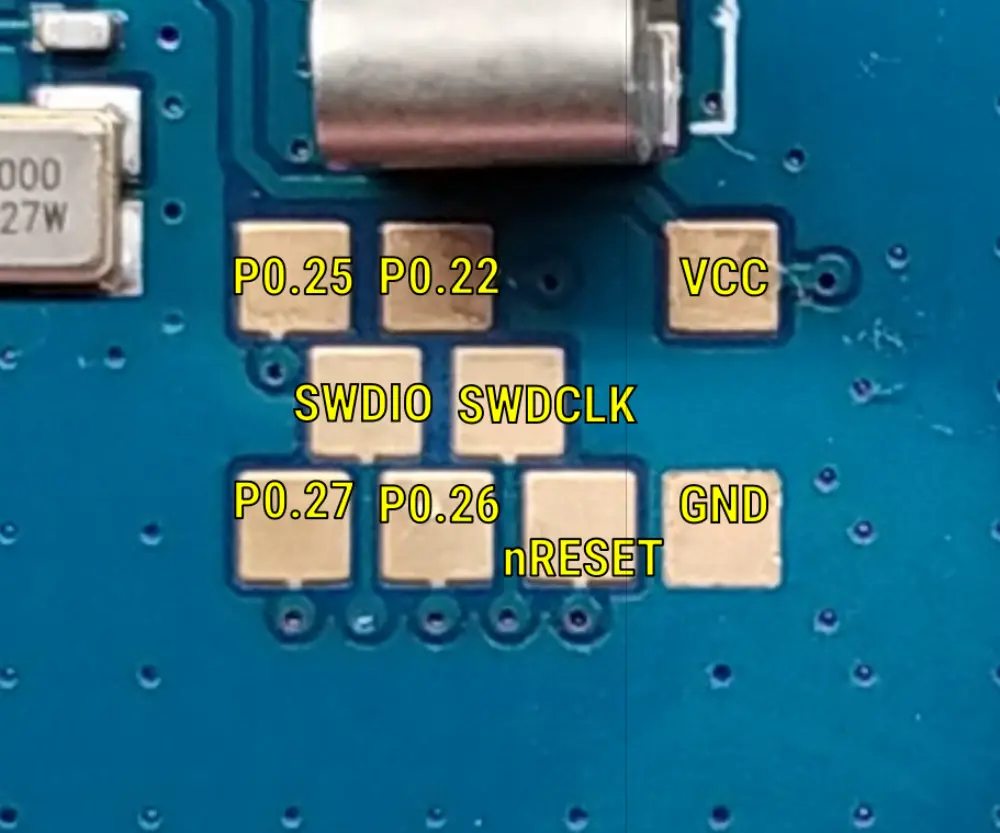
There are also 9 debug pins exposed, accessible after removing the battery cover. I traced the pins to the SoC. The nRF52811 uses the SWD interface and the pinout is as follows:
Lastly, I unplugged the eink panel and found the model is DEPG0266RWS850F30HP-SO. The closest reference I found is the DKE product page for 2.66 inch e ink screen. The resolution of the screen reported on the site is 296×152 and it uses the SSD1680Z8 driver CoG (Chip on Glass).
Strangely, the resolution does not match what is reported in Solum Users manual where the following is written: 2.6 Inch: 360 x 184 Pixel (152dpi) / 60.1 x 30.7mm
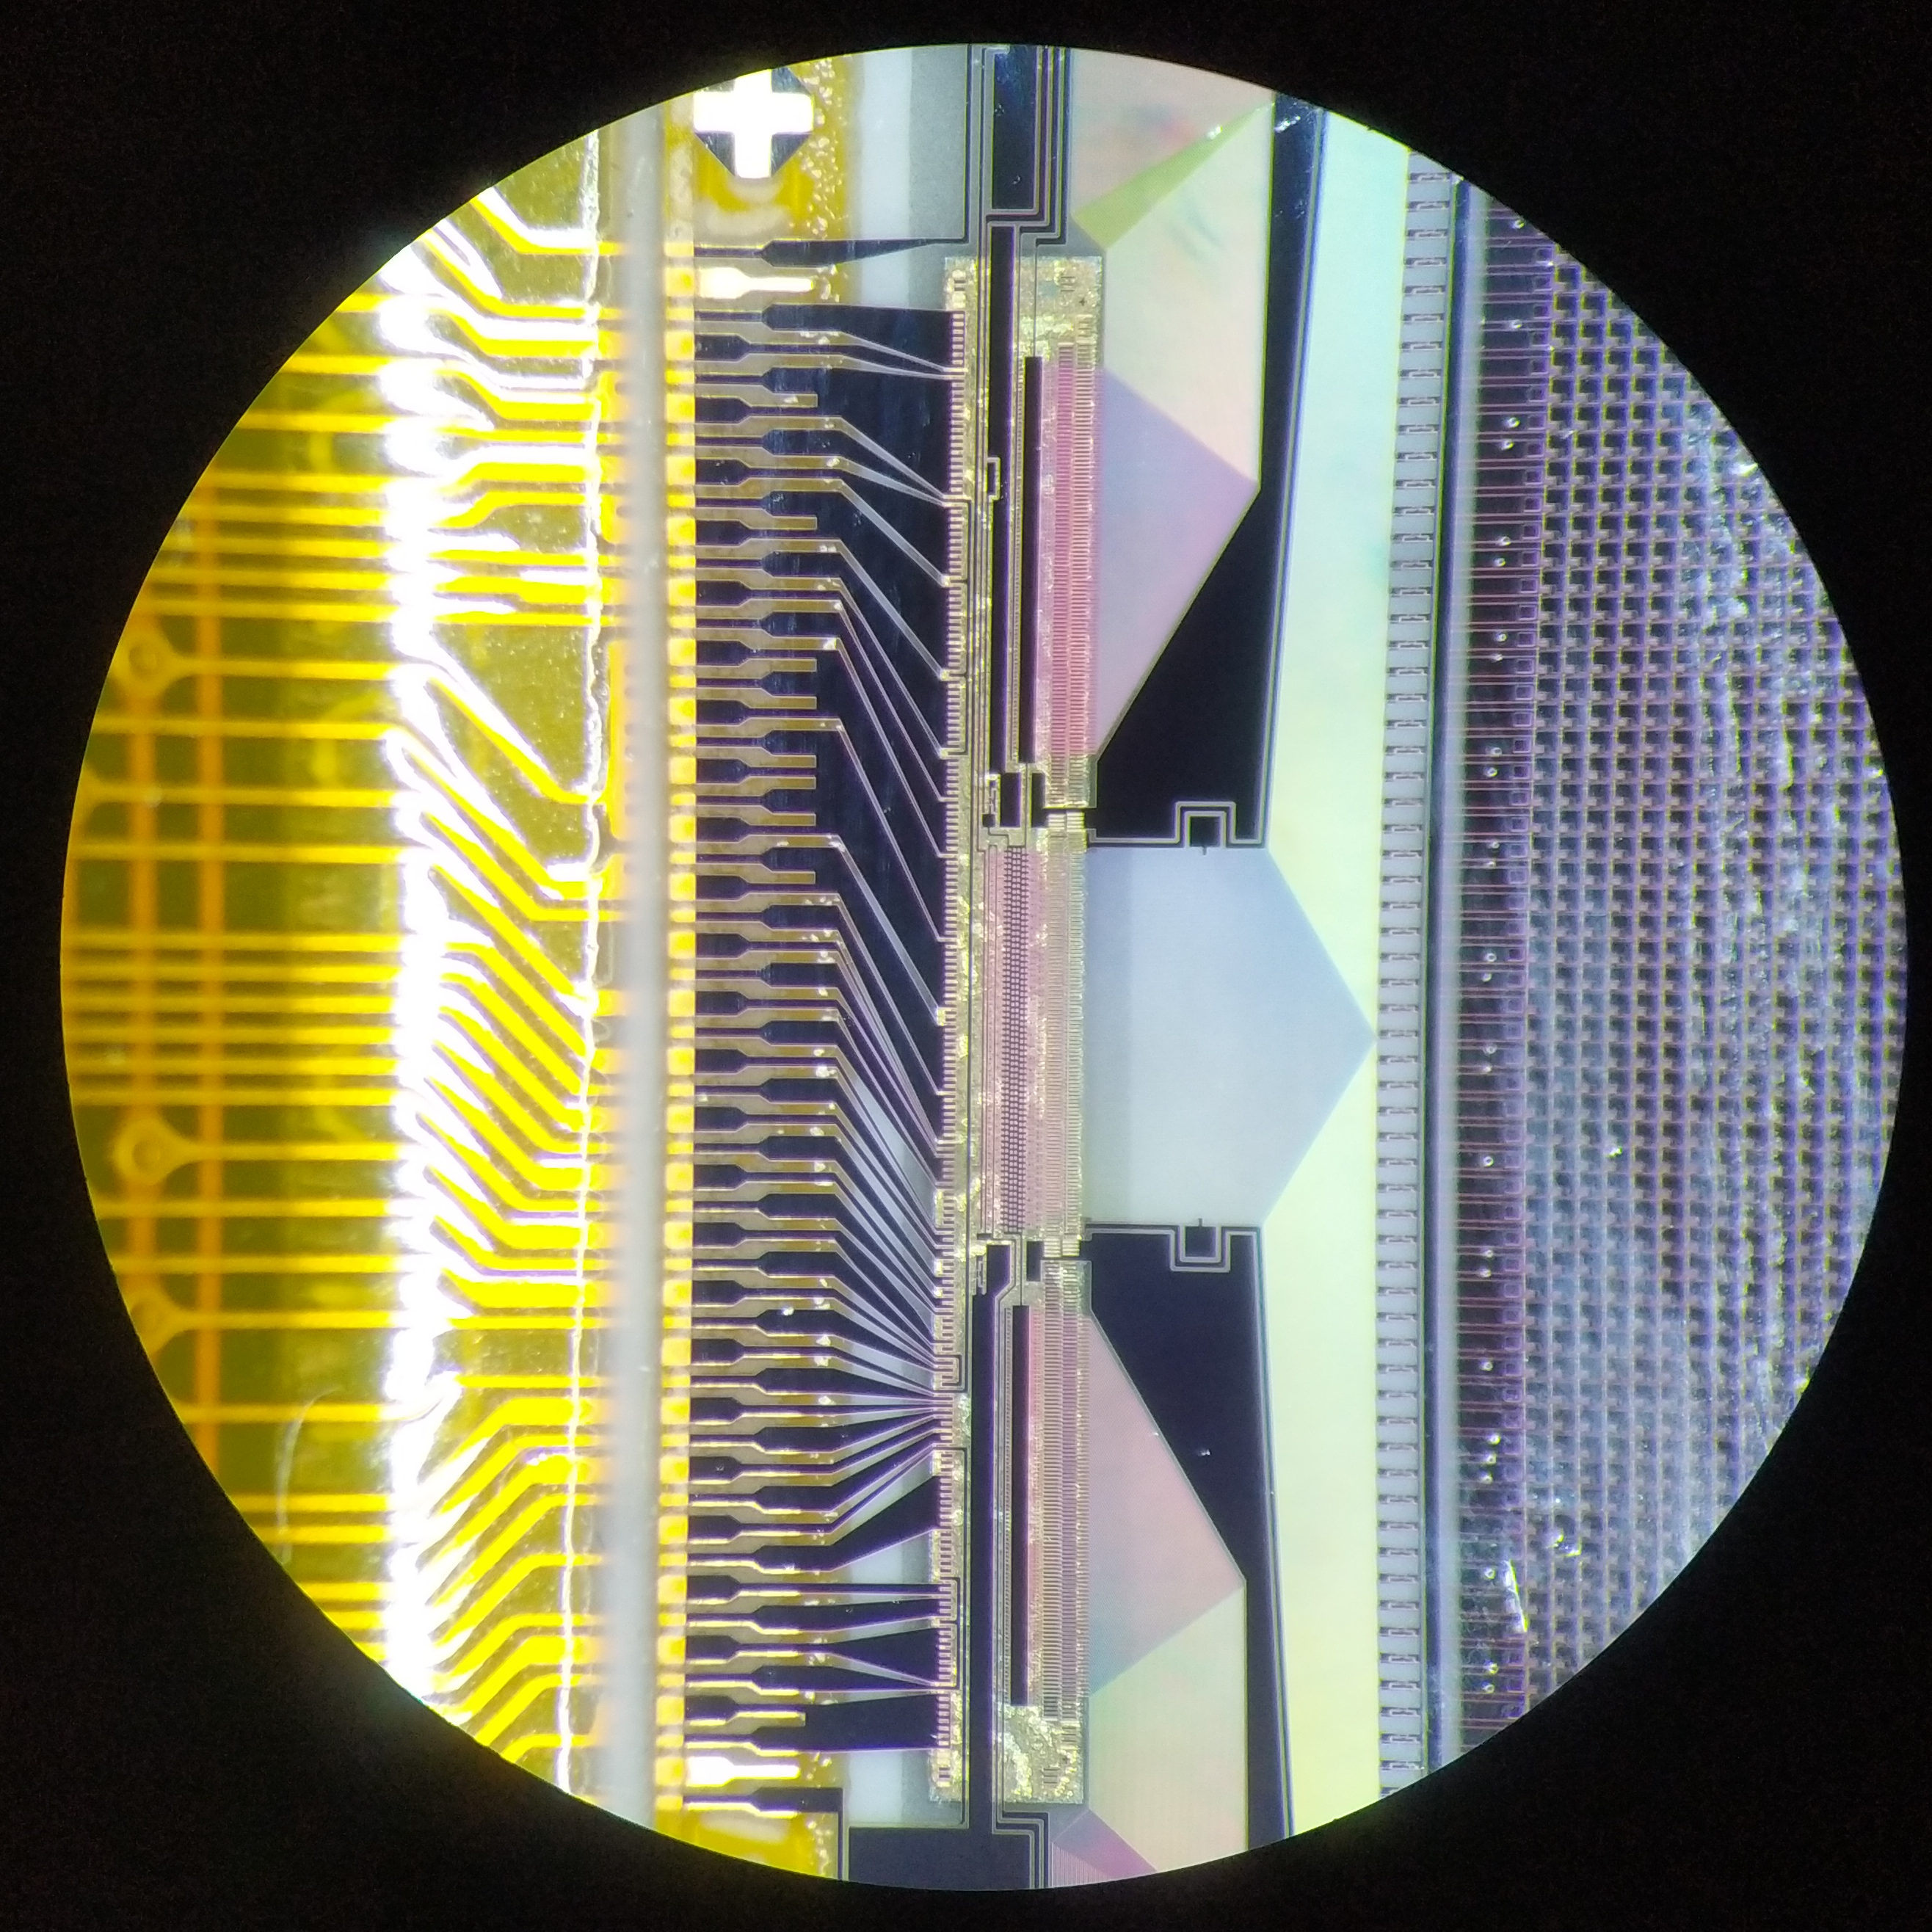
I took a picture of the screen CoG, it could be useful for checking the resolution and help with the CoG identification.
Connecting the debugger
I soldered the exposed debugging pins to a pin header and fixed it to the external case using hot glue.
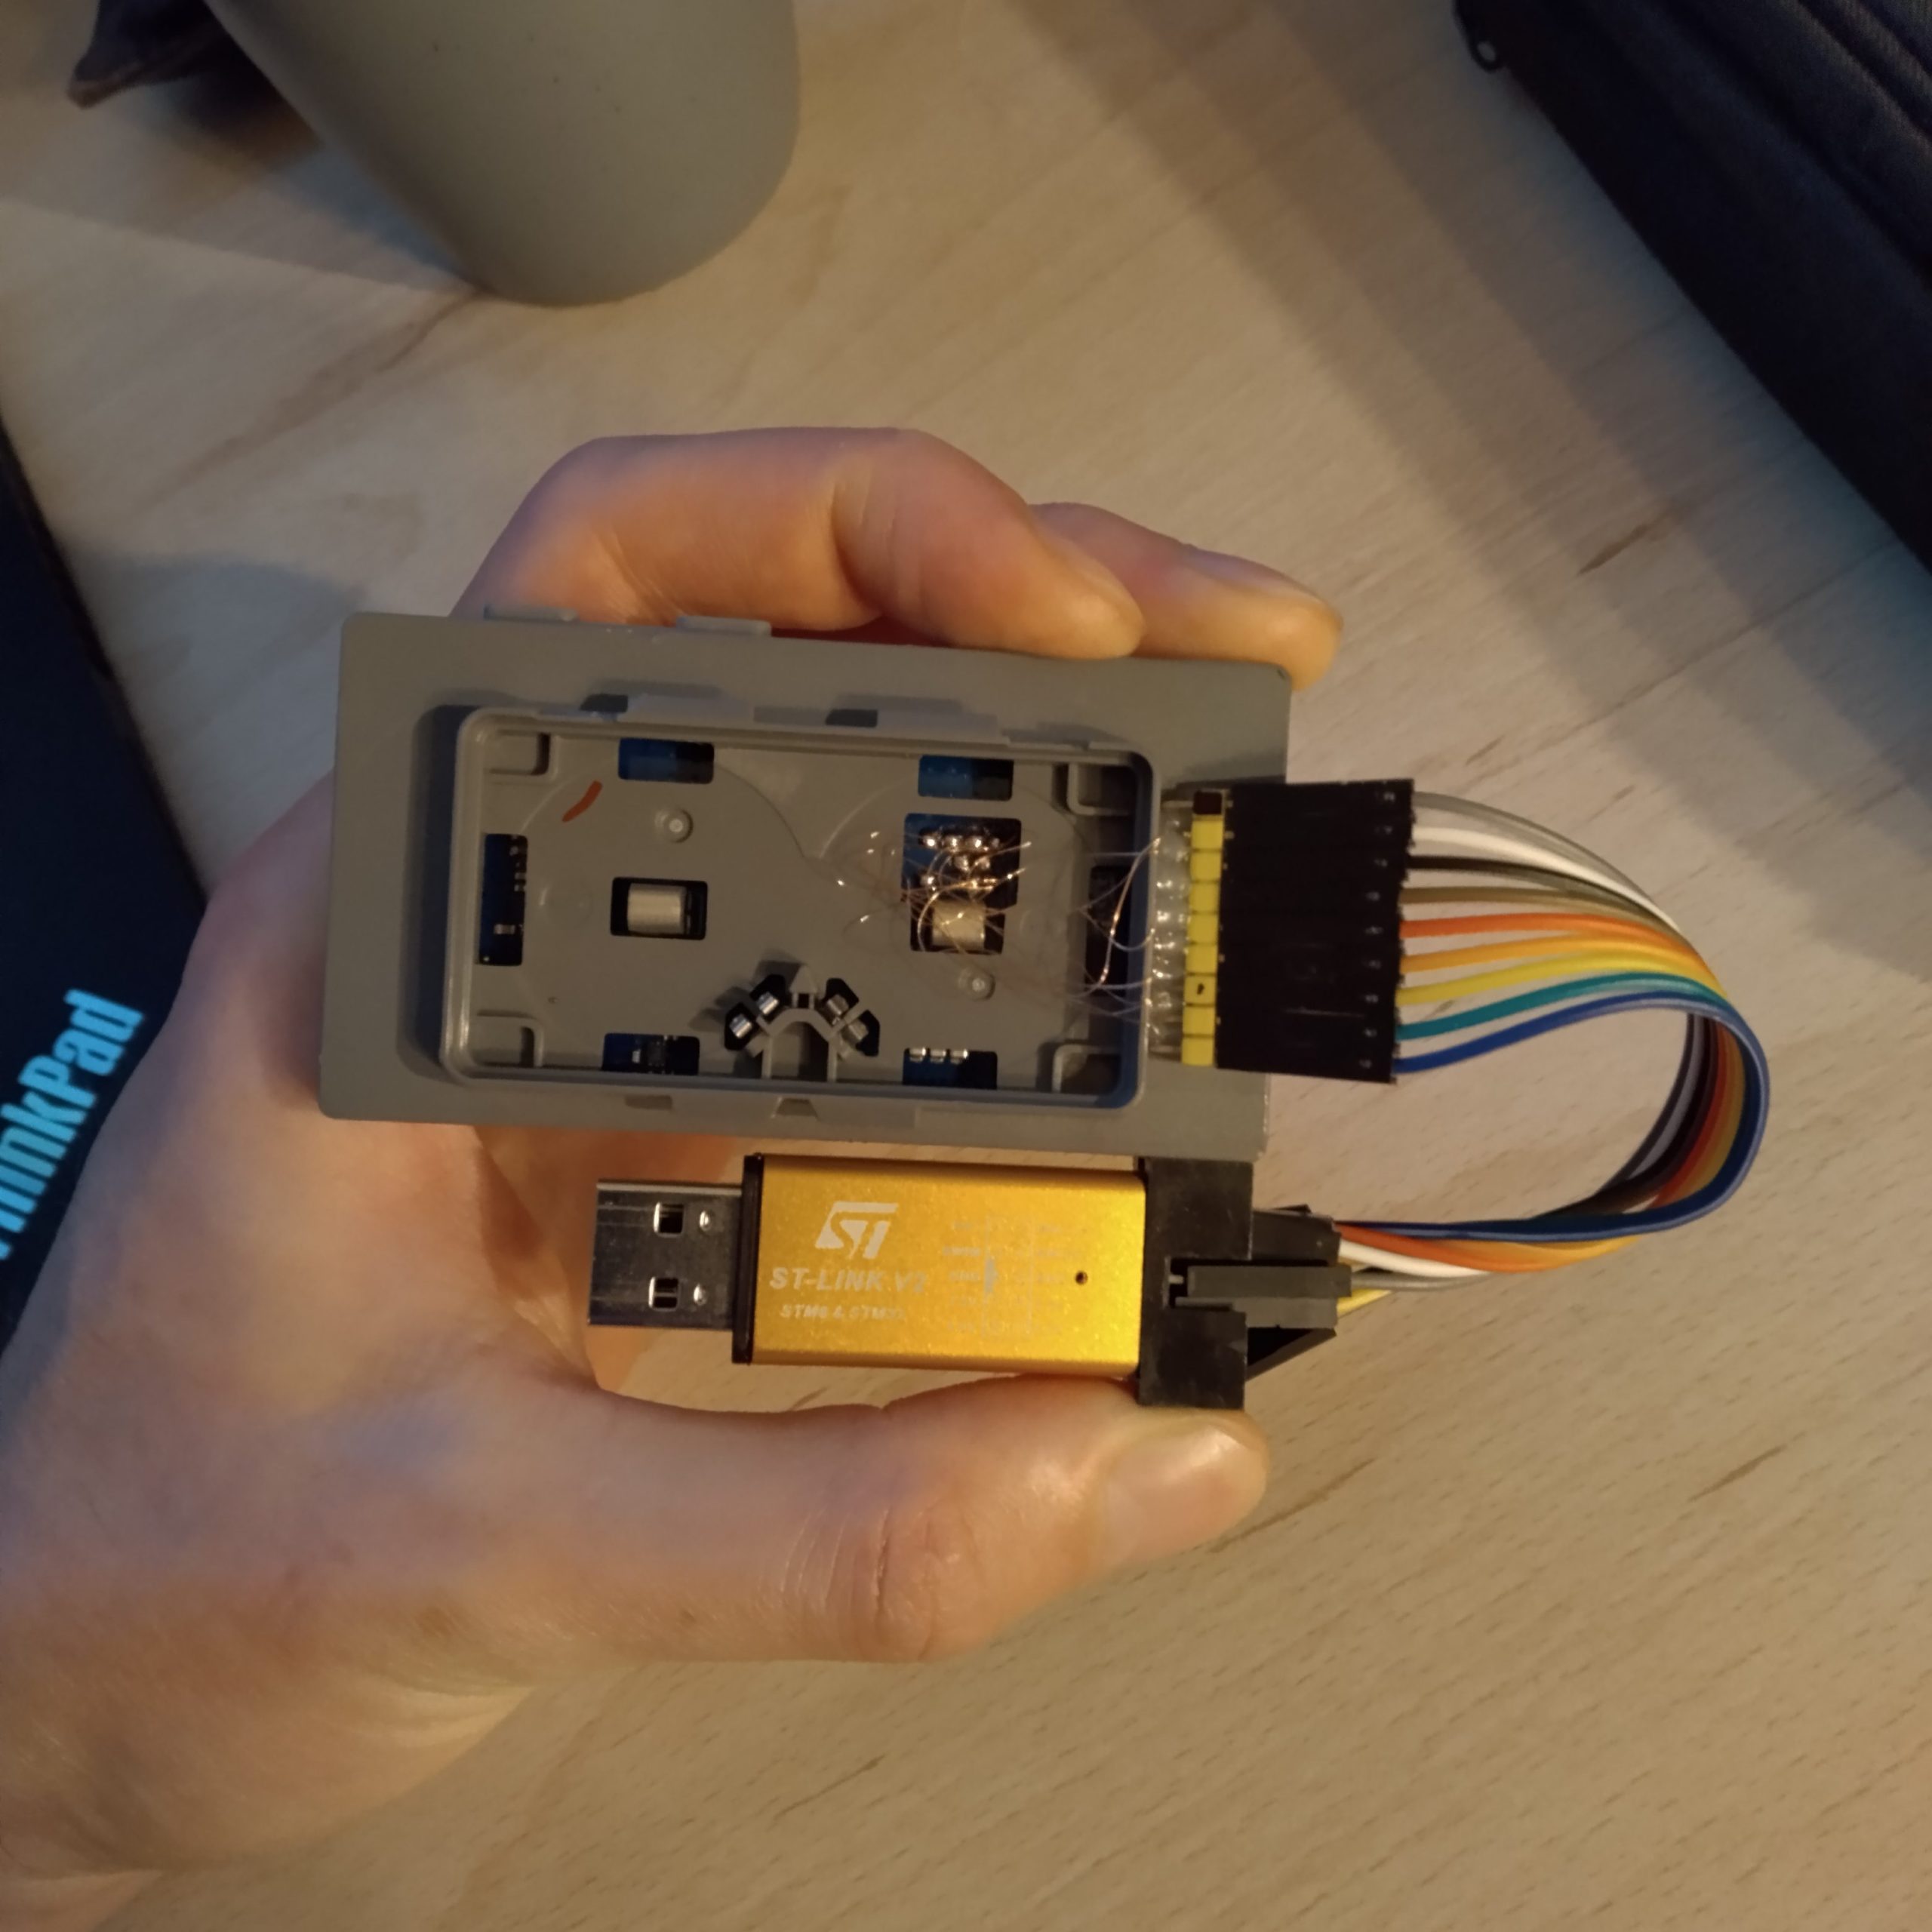
I used a cheap ST-Link v2 clone from Aliexpress as the SWD programmer and connected the SWDIO, SWDCLK, VCC, GND and nRESET pins accordingly.
Using OpenOCD, I started the debugging session by running:
$ openocd -f interface/stlink-dap.cfg -f target/nrf52.cfgIn newer versions of OpenOCD, the DAP mode will be the default and there might be some deprecated messages. Note that if you use the HLA mode, some debugging commands in OpenOCD might not work.
After starting the openocd instance, we should see the following output:
Info : Listening on port 6666 for tcl connections
Info : Listening on port 4444 for telnet connections
Info : clock speed 1000 kHz
Info : STLINK V2J45S7 (API v2) VID:PID 0483:3748
Info : Target voltage: 3.536842
Info : [nrf52.cpu] Cortex-M4 r0p1 processor detected
Info : [nrf52.cpu] target has 6 breakpoints, 4 watchpoints
Info : starting gdb server for nrf52.cpu on 3333
Info : Listening on port 3333 for gdb connections
We see that the correct CPU was detected which is a good sign and we can connect to the debugging session using GDB and debug our firmware. For now, we only want to backup the original firmware for analysis and so we may skip GDB and connect to the OpenOCD server directly using telnet:
telnet localhost 4444Dumping the firmware
Interestingly, the fact we were able to successfully attach the debugger means that the SoC was not debug-locked by the manufacturer. The nRF52811 provides a debug locking mechanism through the APPROTECT configuration register but this is not set on our device.
Even if it was, the APPROTECT mechanism can be bypassed using voltage glitching.
To dump the firmware we check the memory map in the nRF52811 and dump the interesting parts using the dump_image command in the OpenOCD session.
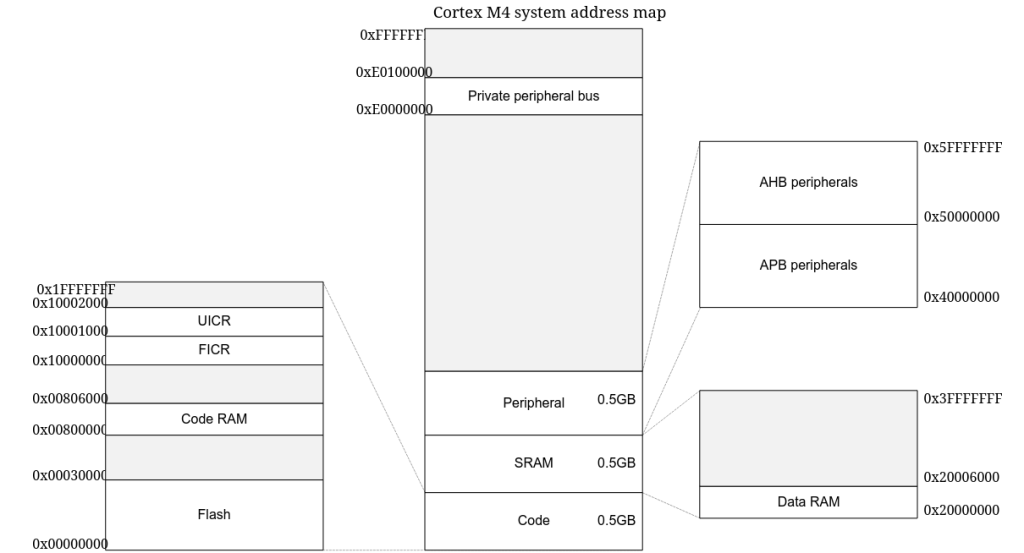
> dump_image solum_newton_m3.flash.bin 0 0x30000
dumped 196608 bytes in 2.269555s (84.598 KiB/s)
Dump the others:
dump_image solum_newton_m3.code_ram.bin 0x00800000 0x6000
dump_image solum_newton_m3.ficr.bin 0x10000000 0x1000
dump_image solum_newton_m3.uicr.bin 0x10001000 0x1000
dump_image solum_newton_m3.data_ram.bin 0x20000000 0x6000
Now one may proceed with firmware analysis and reverse engineering.
Below I show some of the interesting strings extracted using the strings command:
 $ strings -n 10 solum_newton*.bin
7F05ABC2B393ABC2
[l[n[n[n[l@
'1;@EJOV]dk
`Q` h3F*F9F
$-6PUX[^dgmsy
$ ACAD{HJi
_H`I`KaJHM
pGC:\Solum_Git\Newton\NordicSDK\nRF5_SDK_15.3.0_59ac345\examples\solum\proprietary_rf_Tag\__pca10056\blank\iar\..\..\..\..\..\..\modules\nrfx\hal\nrf_gpio.h
C:\Solum_Git\Newton\NordicSDK\nRF5_SDK_15.3.0_59ac345\examples\solum\proprietary_rf_Tag\Src\Peripheral\HAL_w25q80bl.c
`Q` h3F*F9F
""#&(+-0358;>AD
 #%(*-0369<?BFJMQ
0123456789ABCDEFGHIJKLMNOPQRSTUVWXYZ $%*+-./:- 7F05ABC2B393ABC2 is the serial number of the device.
- Two paths C:\Solum_Git\Newton\NordicSDK\nRF5_SDK_15… reference an SDK for Nordic Semiconductor’s nRF5 Series.
Next time we will look into how to program a custom firmware for this platform.
Related Work
Following links are different teardown writeups or wiki pages of similar devices to ours.
- https://github.com/OpenEPaperLink/OpenEPaperLink/wiki/2.2%E2%80%B3-EL022H3WRA
- https://github.com/OpenEPaperLink/OpenEPaperLink/wiki/2.9%E2%80%B3-EL029H3WRA
- https://karlquinsland.com/solum-el022hwra-teardown
Relevant Solum Newton M3 models
This blogpost is relevant for the following Solum Newton models:
- 1.6″ EL016H3WRA EL016H3BRA EL016H3WYA EL016H3BYA
- 2.2″ EL022H3WRA EL022H3BRA EL022H3WYA EL022H3BYA
- 2.6″ EL026H3WRA EL026H3BRA EL026H3WYA EL026H3BYA
- 2.9″ EL029H3WRA EL029H3BRA EL029H3WYA EL029H3BYA
- 4.2″ EL042H3WRA EL042H3BRA EL042H3WYA EL042H3BYA
- 6.0” EL060H3WRA EL060H3BRA EL060H3WYA EL060H3BYA
- 7.5” EL075H3WRA EL075H3BRA EL075H3WYA EL075H3BYA
- 11.6” EL116H3WRA EL116H3BRA EL116H3WYA EL116H3BYA

Leave a Reply